NOTE: Please keep in mind that these techniques work for the Perdix, Petrel, Petrel 2, and Predator despite the slightly different design of each computer.
O-ring Specification:
Petrel: #112, 70D, Buna-N (Nitrile, NBR)
Service Requirements:
- For Each Battery change: Clean, check for signs of damage, and lubricate without removing O-ring
- Replace if damage detected: Remove, replace, lubricate and install new O-ring if signs of wear, compression set, cracking, corrosion or degradation
Removal procedure:

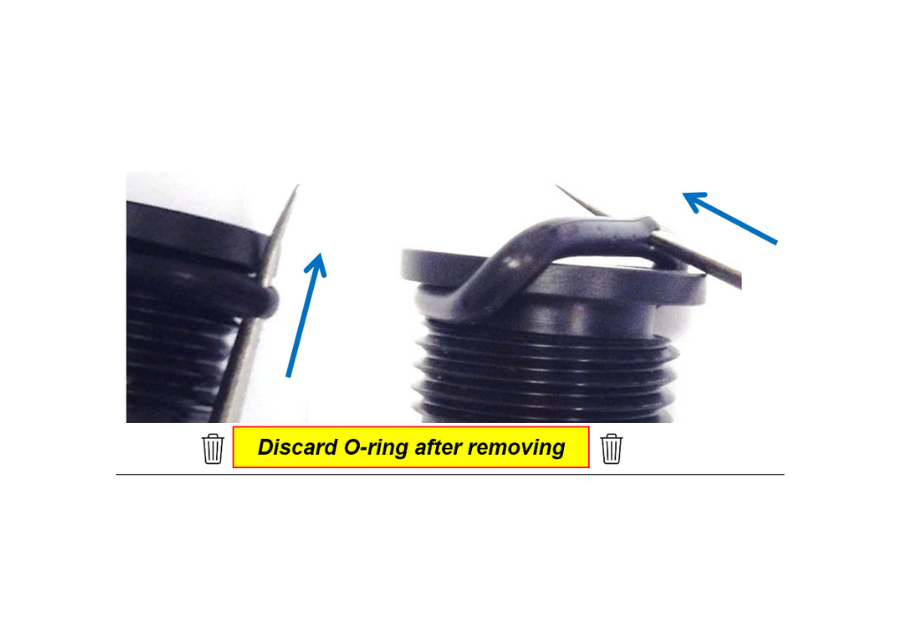
1. Pierce O-ring with a pointed instrument (i.e. O-ring pick, Safety pin, Push pin) Note: Please contact dive shop if apprehensive with removing O-ring

2. Puncture surface and lift O-ring out of groove and over battery cap
Installation procedure:
Lubricate O-ring with a thin film before installing. This protects the O-ring from damage by abrasion, pinching, or cutting. Helps to seat the O-ring properly Protection as a surface film Protects from degradation by atmospheric elements such as ozone Extends the service life
2. Stretch O-ring over battery cap from the end without the spring and threads until O-ring is seated in groove

